


Shoulders are brilliant… until they aren’t. One wrong move on the pitch, a heavy lift, or just bad posture and suddenly you’re hobbling around wondering why it hurts to reach for your morning coffee.
Whether it’s a twinge from training or a more persistent niggle, Kinesiology Tape can be a handy tool to support your shoulder, guide movement, and give you a bit of extra confidence while you keep moving. Let's go through why Kinesiology Tape works, what shoulder injuries it can help with, and exactly how to tape up both your deltoid and trapezius.
HOW TO KINESIOLOGY TAPE SHOULDERS:
WHAT IS KINESIOLOGY TAPE?
Kinesiology Tape is that stretchy, colourful tape you’ve probably seen on athletes at games or in the gym. Unlike your traditional strapping tapes, it moves with your body, offering support without locking a joint down. It’s great for guiding muscle movement, reducing the feeling of instability, and sometimes even helping with swelling.
It’s important to stress: Kinesiology Tape isn’t magic. It won’t fix a serious injury on its own. But for mild shoulder niggles, postural support, or recovery days after a heavy session, it can be a helpful addition to your routine, kind of like a nudge to remind your muscles to behave.

WHY TAPE YOUR SHOULDER?
The shoulder is one of the most mobile joints in the body, which also makes it one of the most unstable. From football and tennis to weightlifting and climbing, shoulders take a lot of strain. Common problems include:
Mild sprains or strains
Rotator cuff niggles
Overuse injuries from repetitive movement
Postural issues causing discomfort
Kinesiology Tape is often the tape of choice here because it supports without restricting movement. It can help you keep training or competing while your shoulder recovers, reduce muscle fatigue, and provide a bit of proprioceptive feedback. Basically, your shoulder gets a gentle reminder of where it should be moving.

TAPING THE DELTOID
Here’s our go-to shoulder application. It’s designed to support the deltoid without restricting your arm, giving you both stability and freedom of movement.
STEP 1
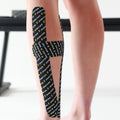
Measure from the deltoid tuberosity to the acromion and cut 2 strips of Kinesiology Tape. Make the tape slightly longer to allow for the stretch. Prepare a Y strip by cutting one strip in half lengthways, leaving a small tab at one end.
STEP 2
Stick the tab to the deltoid tuberosity with 0% stretch. Bring your arm behind your back, placing the shoulder in horizontal adduction and medial rotation. Lay the anterior tail of the Y strip along the front of the deltoid, finishing at the shoulder.
STEP 3
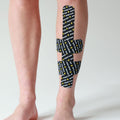
Move the arm to a full stretch across the front of your body, supporting with the other arm if needed. Lay the posterior tail of the Y strip along the back of the deltoid, finishing at the shoulder and creating a teardrop shape.
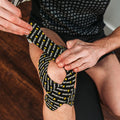
STEP 4
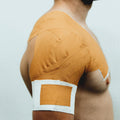
Measure and cut another strip of tape from the slump of your shoulder, tilt your head towards the opposite shoulder, and lay the base at the bottom of the deltoid with 0% stretch. Stick the rest of the tape up the arm and across the shoulder. Wait 30 minutes before exercising to allow the tape to fully adhere.
This setup gives your deltoid support across all angles of movement, without feeling rigid or restrictive.

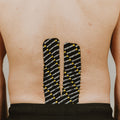
TAPING THE TRAPEZIUS
Your trapezius also gets a workout when you’re lifting, throwing, or just hunching over a desk. Taping it can help relieve tension, improve posture, and give that upper shoulder a bit of extra guidance.
STEP 1
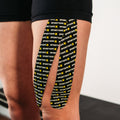
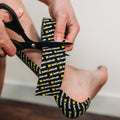
Measure and cut a strip of Kinesiology Tape from your hairline to the shoulder. Round the edges to prevent catching on clothing. Rip the backing paper at one end to reveal a small tab.
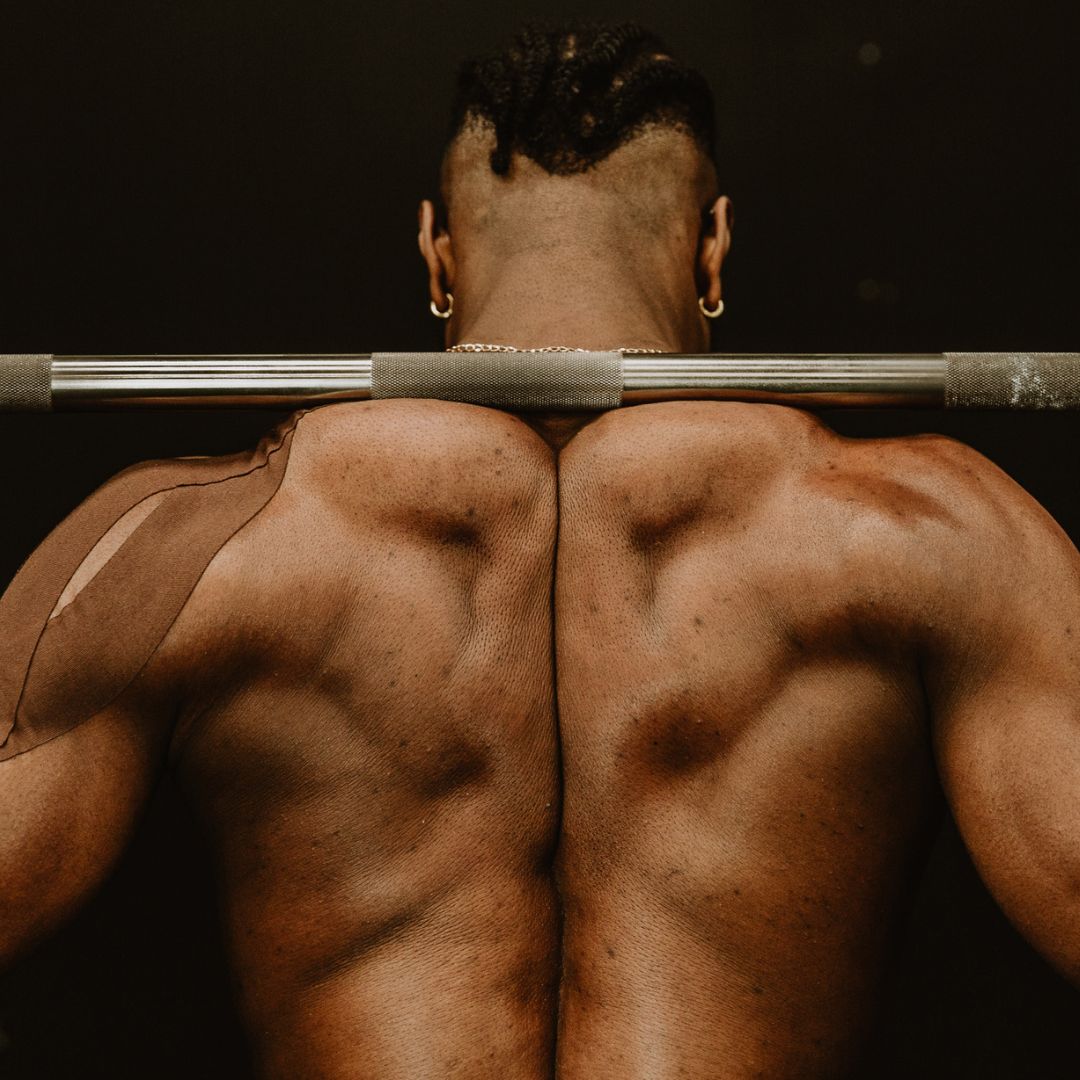
STEP 2
Stick the tab down at the hairline with 0% stretch. Tilt your neck towards the opposite shoulder to put the Upper Trapezius on stretch, then stick the rest of the tape down with 0% stretch. Wait at least 30 minutes before exercising.
This method gently supports your upper back and shoulder, making it useful for postural support or after a heavy lifting session.

TIPS FOR SUCCESSFUL SHOULDER TAPING
Always prep your skin: Clean, dry skin without lotion gives the best adhesion.
Round the edges: This prevents the tape from peeling prematurely.
Apply 0% stretch at the ends: Helps the tape stick and reduces irritation.
Give it time: Wait at least 30 minutes before exercising to let the tape settle.
Check your range of motion: The tape should support, not restrict. If it feels tight or painful, remove it.
Seek medical advice: Whether you’re new to taping or a seasoned pro, always assess your shoulder first. If in doubt, get it checked.
OTHER THINGS TO CONSIDER
Kinesiology Taping works best as part of a wider shoulder care routine. Stretching, strengthening, and proper warm-up are key. Also, everyone’s shoulder is different. Some might need a bit more support across the front deltoid, while others benefit from extra trapezius coverage. Don’t be afraid to adjust the placement slightly to match your body’s needs.
In other words, experiment a bit to work out what works the best for you!

Taping your shoulder with Kinesiology Tape can give you that little bit of extra support, help reduce discomfort, and remind your muscles how to move. Whether you’re supporting your deltoid, trapezius, or both, the key is applying it correctly, giving it time to set, and combining it with good shoulder care habits.
So grab your tape, follow the steps, and keep your shoulders moving safely, whether it’s training, lifting, or just reaching for that coffee.
